
How to Restore Faded Photos: A Step-by-Step Guide to Preserving Your Memories
Photo Restoration Melbourne
by Photo Restoration Rescue
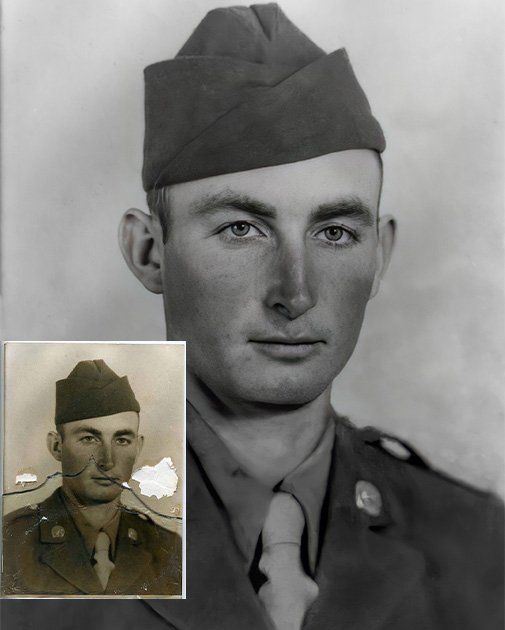
Faded photos are a common problem, especially for those cherished family portraits or vintage snapshots that have been tucked away in albums or boxes for decades. Over time, exposure to light, humidity, and poor storage conditions can cause colours to fade, leaving your memories looking dull and lifeless. But don’t worry—restoring faded photos is easier than you might think! In this step-by-step guide, we’ll walk you through the process of bringing your faded photos back to life, whether you’re doing it yourself or seeking professional help.
Step 1: Assess the Damage
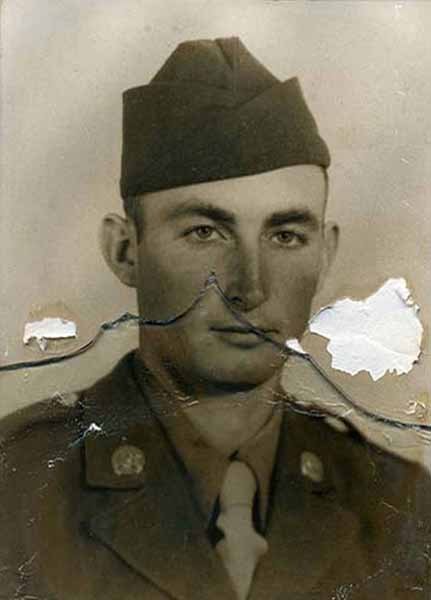
Before starting the restoration process, carefully examine your faded photo. Look for:
Level of fading: Is the entire photo faded, or just certain areas?
Additional damage: Are there scratches, tears, or stains that need attention?
Photo type: Is it a colour photo, black-and-white, or sepia-toned?
Level of fading: Is the entire photo faded, or are only certain areas affected?
Additional damage: Are there scratches, tears, stains, or creases that need attention?
Photo type: Is it a colour photo, a black-and-white image, or a sepia-toned print?
Understanding the extent of the damage will help you determine whether you can restore the photo yourself or if it’s better to seek professional help. For severely damaged or highly valuable photos, professional restoration is often the best option.
Step 2: Digitise the Photo
The first step in restoring a faded photo is to create a high-quality digital copy. This allows you to work on the image without risking further damage to the original. Here’s how to digitise your photo:
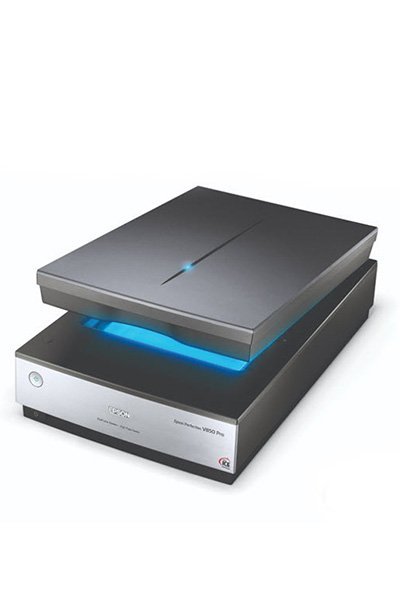
Use a Scanner:
Place the photo on a flatbed scanner and ensure it lies flat.
Scan the photo at a high resolution (at least 600 DPI) to capture all the details.
Save the scanned image in a lossless format like TIFF or PNG to preserve quality.
Digitising your photo provides a safe and flexible way to restore it, as you can work on the digital copy without altering the original.
Step 3: Use Photo Editing Software
Once you have a digital copy, you can use photo editing software to restore the faded colours. Popular tools include:
Adobe Photoshop (professional-grade)
GIMP (free alternative)
Online photo editors like Fotor or PhotoPea
Steps for Restoring Faded Photos:
Restore Fading:
Use the level tool in Photoshop to bring the colour channels back.
Use the dodge and burn tool to fix up faded and darkened areas of the photo.
Adjust Brightness and Contrast:
- Increase the contrast to make the details stand out and adjust the brightness to balance the overall tone.
- Be careful not to overdo it, as excessive adjustments can make the photo look unnatural.
Enhance Colours:
- Use tools like “Hue/Saturation” or “Vibrance” to restore faded colours.
- For black-and-white photos, consider adding subtle tones or converting them to sepia for a vintage look.
Sharpen Details:
- Apply a subtle sharpening filter to bring out fine details that may have been lost.
- Avoid over-sharpening, as it can create unwanted artefacts.
Repair Damage Areas:
- Use the clone stamp or healing brush tool to fix scratches, stains, or other imperfections.
- Take your time with this step to ensure a seamless restoration.
Crop and Straighten:
- If necessary, crop the photo to remove unwanted edges or straighten crooked images.
Step 4: Save and Print the Restored Photo
Once you’re satisfied with the restoration, save the digital file in a high-quality format like JPEG or PNG. If you want a physical copy, consider printing the photo on high-quality photo paper using a professional printer. Many local print shops or online services offer excellent printing options for restored photos.
When to Seek Professional Help
While DIY restoration can work for minor fading or damage, some photos require professional expertise. Here are a few scenarios where professional restoration is recommended:
Severe fading or discolouration: If the photo is heavily faded or has uneven colour loss, professionals can restore it more effectively.
Physical damage: Tears, creases, or water damage often require advanced techniques to repair.
Vintage or historical photos: Older photos, especially those from the 19th or early 20th century, may need specialised care.
High sentimental value: If the photo holds significant emotional importance, it’s worth investing in professional restoration to ensure the best results.
At Photo Restoration Melbourne, we specialise in restoring faded and damaged photos with precision and care. Our team uses state-of-the-art tools and techniques to bring your memories back to life, ensuring every detail is preserved.
Why Choose Professional Photo Restoration?
Expertise: Our team has years of experience in restoring all types of photos, from minor fading to severe damage.
Advanced Tools: We use cutting-edge software and equipment to achieve the highest quality results.
Personalised Service: We treat every photo as a unique piece of history, tailoring our approach to meet your specific needs.
Affordable Pricing: We believe that everyone should have the opportunity to preserve their memories, which is why we offer competitive pricing without compromising on quality.
Experience Photo Restoration Excellence Pay Only If You're Satisfied
Allow our experts to restore your damaged photos with precision and care - satisfaction guaranteed!
You only pay if you are completely satisfied with the results.